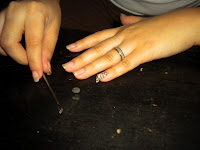
The materials needed are:
1. Base coat
2. Top coat
3. Scissors
4. Small container with water
5. Pusher
6. Nail file
7. Water decals
8. Cotton balls (not in picture)
Step 1. Clean your nails and cut your cuticles. Apply a nail thickener and/or base coat. Let dry.
Step 2. Cut up the nail decals, you can cut it up into individual strips or like what I do into strips of 3 because this will help me determine which decal goes into which nail.
Step 3. Submerge the cut up nail decals into the water.
Step 4. You will know that the decals are ready to use once they start to peel from the paper backing.
Step 5. Pick up the decal and place on the nail where it fits.
Step 6. Use a wet cotton ball to press on the decal on your nail.
Step 7. Use a pusher to tuck in the decal in all sides.
Step 8. Once the decal is in its desired place, use a top coat to seal it in.
Step 9. Once a top coat is brushed on you will notice that the decal seems to melt onto the nail and the top end will seem to curl up. Use the pusher to remove the excess decal.
Step 10. Let the top coat dry, you can use a quick drying top coat if you like. It is finished! :) Enjoy!


No comments:
Post a Comment